Saturday 31 December 2011

And then there were seven.


Am loving these baskets!
It is surprising how you only need five minutes to sneak away and finish one.
That's my sort of sewing.

Liberated baskets- from Gwn Marston's book 'Liberated Quiltmaking II'


Friday 30 December 2011

A new book and a bit of time!

We had a great christmas and as we cleared away the temporary campbeds in the study I was able to get my boxes out and have a look at a new book that I got for christmas.

My new book!

I first saw this book last spring on a post over at Blue Elephant Stitches.
 I really loved her liberated baskets and have had the book on my wish list since then.

I love it.
Lots of ideas and a 'liberated' way of doing things that I just think is great.
I started with baskets..

First two baskets

With a background of shirts of course!

Also finished a little pencil case which is a present for a friend..


Pencil case

Wednesday 28 December 2011

Merry Christmas and a Happy New Year.

Heart decoration

So much for posting this on Christmas Eve!
 I'm afraid the lack of cleaning for the rest of the year caught up on me and the housefull of visitors arriving was enough of an incentive to get cracking.

I managed to finish the wonky star cushion planned for some friends..

Wonky star cushion

Despite there having been loads of berries on the Holly earlier in the year, the birds have obviously been busy and there are only a couple left now..

Wonky star cushion

The back was a simple envelope with a bit of green binding and a button..

Cushion reverse

Love the matching nail varnish!! (Not mine)

Hope you all had a good christmas and wish you a Happy New Year.

Saturday 10 December 2011

Festive cheer.


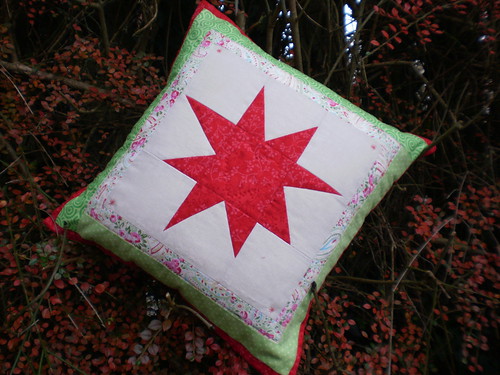
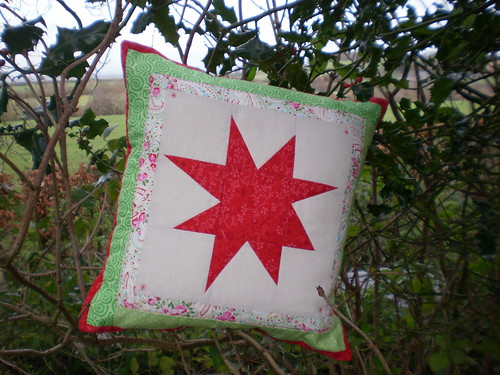
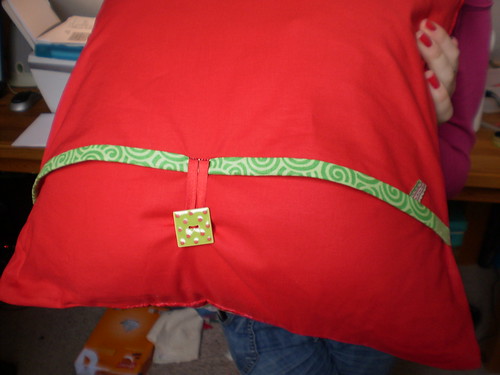
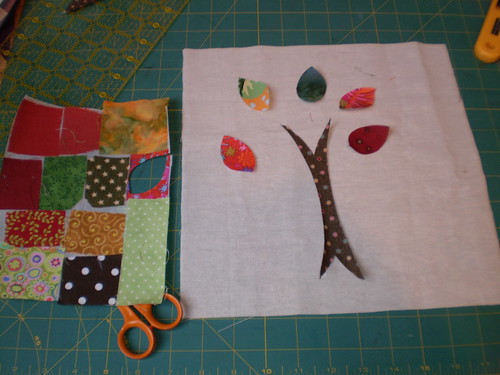
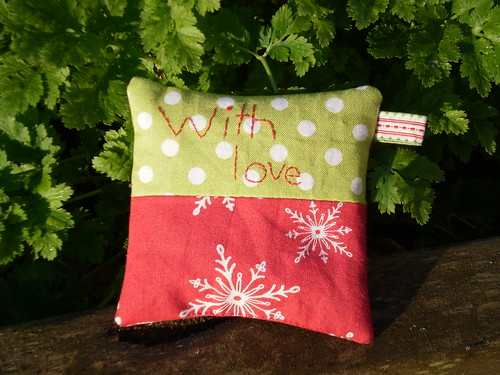
I have finished the little scrapbuster cushion mentioned in my last post.

004

I am pleased with the way it came out and it was really fun to do and brilliant for using up little scraps that you just can't bear to throw away. I added a sachet of lavender to the inside aswell.

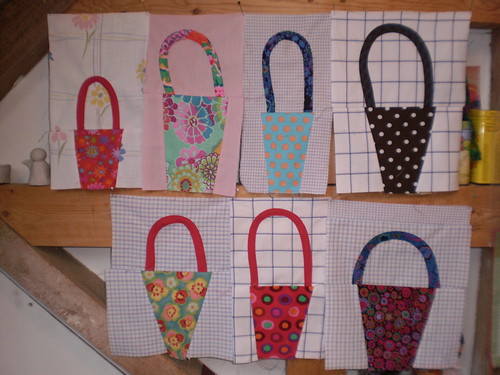
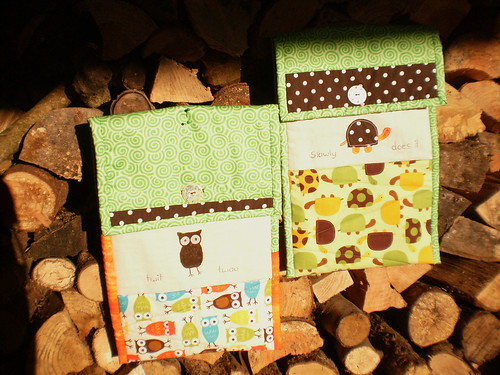
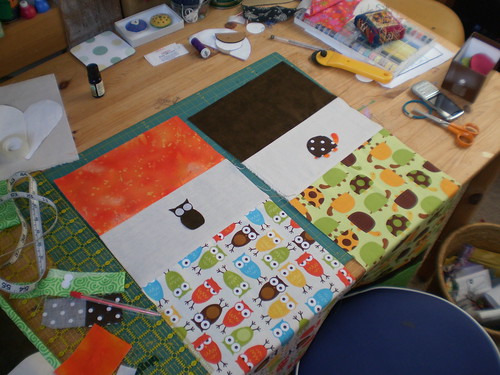
I am working on a few presents but none ready to show yet. I have also decided that it would be nice to have all red and white cushion covers, as if I haven't got enough to do!!

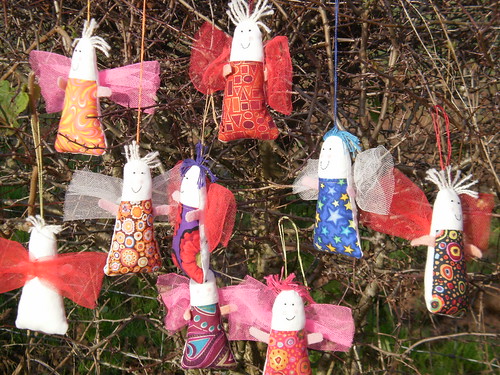
The tree is now up and as I was getting out the decorations the sun kindly came out so I took them into the garden for a photo shoot.

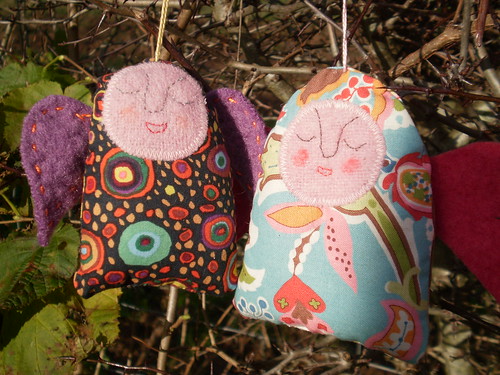
Firstly some angels that I made about 3 years ago I think. I am a big fan of the blog Syko, and got my inspiration from Kajsa's lovely angels. I love the look of her new book, Scandinavian Stitches which is definitely on my christmas list!

Angels inspired by ones made by Kajsa from the blog Syko


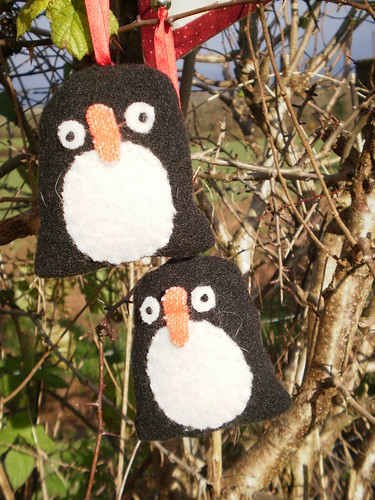
Then there's the penguins which are even older, about 5 years I think. They were made from a tutorial over at Molly Chicken. Sadly she doesn't post any more but she was the first blog I ever found.

Penguins from tutorial by Molly Chicken


And then there's the little Angels I made after making some of the Guardian Angels mentioned here by Hersenzart.

Little angel tree ornaments inspired by the Guardian Angel by Hersenzart


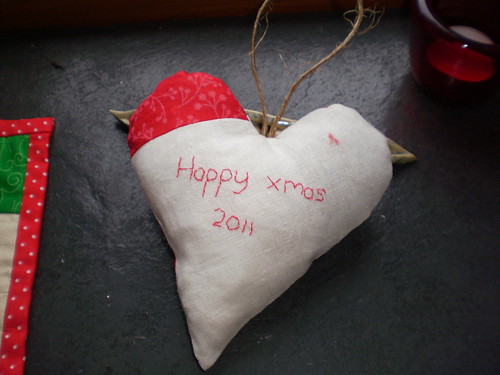
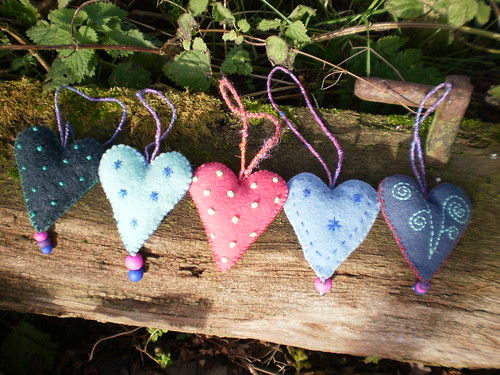
Some lettle felt hearts..

Felt hearts


And some ancient felt dangly things with bells on!

Jingly felt tree decorations


I think that will do for now, cushion covers beckon (and the dinner, the urgent bathroom decorating, christmas card writing and numerous other things).
Happy weekend.

Sunday 4 December 2011

Is it really December already?!

I have done various bits of sewing in the past two weeks but didn't manage to get any pictures as I was in a bit of a rush, the light was rubbish and the things were all wrapped or given before they were recorded!

This weekend I have managed to get an apron done for a present and am hoping the recipient doesn't read this.
Apron

Pocket detail for apron

Light still not great but never mind, you get the gist.

I have also been working on a scrapbuster pillow which I have been meaning to try for ages. The original pattern was in the 2009 Handmade holidays on Sew Mama Sew. I just love their Handmade holidays that they do each November and spend far too much time browsing and not nearly so much time sewing! It starts with putting scraps onto a piece of bondaweb type stuff, but don't do what I did and leave little gaps that then stick a load of gew on the iron!!

The start of a scrap buster pillow from tutorial on Sew Mama Sew (Handmade Holidays 2009 sit back and relax).


I have done a bit of machine applique and decided to start another project at the same time hence the strip at the top. Hopefully the sun will be out by the time the projects are finished as it is tipping with rain right now.

Some applique inprogress

Happy sewing.

Sunday 20 November 2011

A couple more hot water bottle covers and a covered pot!!

Hot water bottle covers

I think that the wood pile is my favourite spot to photo my sewing at the moment but it does mean catching the sun as it goes down.
Two more hot water bottle covers finished ready for christmas.
Hot water bottle cover

Hot water bottle cover

Then I had a small scrap busting idea when I saw a pot that I decided to fill with the hair bobbles that I find liberally scattered around the house.
I decided it could use a sleeve..

pot revamped!


And just look at the gorgeous blue sky through the fig tree..

Blue skies through fig tree

And by the way does anyone know if I should cut those small figs off or leave them on over the winter?
I am never sure.

Tuesday 15 November 2011

A tea bag wallet.

tea bag wallet fromtutorial by handmadetherapy

I have been looking at these little fellows on Flickr for a while and had a spare few minutes on sunday. It is the perfect gift for a friend who drinks lots of herbal tea and always carries her own supply just in case. I found a tutorial here by Handmadetherapy and it was easy to follow and handy to have the measurements. I swapped the elastic for a tab and button hole.
That's another present ready!


tea bag wallet fromtutorial by handmadetherapy

Reverse.


tea bag wallet fromtutorial by handmadetherapy

And inside!

Sunday 13 November 2011

Is that a Herd of Reindeer in the Hedge?!

A Herd of Reindeer in the Hedge!

I have now completed 9 reindeer for the fair,

Gathered Clutch from pattern by Noodlehead

And two more Gathered Clutch purses from the pattern I mentioned by Noodlehead. Well actually there were three more purses but one has already been snaffled by my daughter!
I have been putting in small pockets instead of the divider and card holder which makes them a bit quicker and I can finally say that after my fourth purse I can now do the tab ended zip bit with confidence!
It did take three partially correct ones first though, but I am hoping that a man on a galloping horse and all that..

Gathered Clutch pocket detail


And finally this weekend, I have started another couple of hot water bottle covers..

WIP

WIP.
Happy sunny weekend!

Wednesday 9 November 2011

Festive badges and Clutch bags.

Here are the prototypes for the school chrismas fair badges. I have been madly cutting out the bits and the only sewing involved is the nose or central button (and even the nose could be hot glued for the weanies). The eyes are made from split pins and the mouth is drawn on using a fabric marker. All the pieces are then hot glued together. The circular badges are just held together by the central button. I think that I mentioned that having done a more ambitious sewing project in the past I realised that I need to keep it simple.

Christmas badges for school fair

I have had a lovely morning of sewing today despite the awful weather outside. I have been trying out a couple of clutch bags to go with my outfit for the wedding we are going to.

Clutch purses. Top one is from a pattern by Keyka Lou Patterns and lower one from online pattern by Noodlehead.

(Photos not great sorry as the light isn't good!)
The top one is from a pattern by Keyka Lou Patterns. 

The lower one is from an online pattern for a 'Gathered Clutch' by Noodlehead.

They were both really well explained patterns and made up just as expected.
I found the zip quite tricky on the gathered clutch but I really love it and am determined to get the hang of the zips with the tab ends.
With this in mind I cut out three more last night while watching Julie Walters in The Jury!!
I think that they will make lovely presents.


More clutches to come (Noodlehead pattern)

Sunday 6 November 2011

A busy couple of weeks.

I have done little sewing over the past two weeks as we are preparing for a family wedding and it is very exciting.
I did manage to sew a little lavender bag while away..

Lavender bag

And have a stack of reindeer ready to sew into bean bags..

More reindeer on the way
I have also come up with a badge for the children to make at the fair but did not manage to get a photo before the sun went down today!

Friday 21 October 2011

Treasured finds and a peg bag lesson.

Embroidery threads

I love rooting around in charity shops and earlier in the week I found these lovely threads bundled up in a plastic bag for 50p!
I also found the square of cream fabric, cotton or cotton linen mix, I'm not sure.

Embroidery threads

Then there was a bag of these, all meticulously labelled and putting my box of unlabelled, knotted threads to shame.

Zip and poppers

And finally these beauties. Just look at the packet on the zip and the original price of the poppers!
I like to think that whoever they belonged to would be happy to see them recycled and used.
Peg bag

I had a friend over today who bought a sewing machine a while back and needed a few pointers, so we made peg bags because I think they are a good way to start and you end up with something useful.

Monday 17 October 2011

My weekend's sewing..

I have come up with this fellow, and thought I might make some for the christmas fair for the children. He is a bean bag filled with grain and I've done chickens in a similar way in the past and they are very tactile and good for throwing around!!

Bean bag toy


My inspiration came from a picture of a reindeer printed out from the very first blog I ever read,
Molly Chicken.
 Unfortunately the blog has not been added to since january 2010, and I have been back to the archives but can't for the life of me find the link for the reindeer. Her's was a free standing reindeer with a base but I always loved the simplicity of it.
I made this using the same base pattern as for the Smelly Nellies and the Aroma Robbins.
I cut the bag out of old cord trousers and appliqued on the face. The antlers are a double layer of felt zig zagged together to give them some strength.

Bean bag toy

I have also finished another couple or mug rugs using the tree pattern as before here.


Saturday 15 October 2011

Festive in October, oh my word!!


Cards and festive felt

What has come over me!
 I got an email from MOO (presumably after ordering these), saying I could have a reduction and the next thing I knew I had ordered some cards for christmas. I have never done this before.
 The process was very easy and a few days later this came through the post..
A little box from MOO

 
And then I was asked to do my 'usual' craft activity at the school fair in November so I decided to get a few red and green supplies so that I can do some experimenting and try and come up with a new twist on the badges of the last couple of years.
 Last time I underestimated the amount of help the little ones need with any actual sewing so I plan to keep it simple.
Has anyone else got any tips or ideas?


Festive supplies

And the gorgeous flower spikes on the pineapple sage are just coming out
and match in rather well!

Pineapple sage

Sunday 9 October 2011

Starting to make a few christmas presents.

I like this design and it's one I have done a few times now, a very simple hot water bottle cover.

Hot water bottle cover

I start by making a strip of outside (approx 10" by 35"). This can be made up anyway you want.

Hot water bottle cover in the making
Then I layer this with wadding or blanket in the middle and some lining fabric (more recycled shirt in this case) and quilt the 3 layers together.

Hot water bottle cover in the making


 I bind one of the short edges, then I fold the strip to form a pocket with a flap of about 5" sticking out at one end. The flap is the unfinished short edge.
I sew the two side seams with wrong sides together (ie so the cover is the right way out when you sew it and there are two unfinished seams down the sides).
Finally I bind the three unfinished edges and attach a button!
Hot water bottle cover


Hot water bottle cover 

I hope that makes sense for anyone who wants to have a go.