Monday 30 September 2013

My First Washi Dress

Washi Dress
 
It's finished and I love it!
It must be the most comfortable dress I have ever made with the stretchy panel of shirring at the back..
 
Washi Dress
 
And the empire line style..
 
Washi Dress. Pattern by Rae at made-by-rae.com
 
It took less than a day to make from start to finish and that was with shopping, cleaning and taxiing included.
 
The pattern was designed by Rae from made-by-rae , and was a PDF pattern that arrived almost immediately.
I printed out the 36 pages and pieced at all together.
This wasn't as complicated as I thought it might be, and was way outweighed by the fact that it was so instant.
I made it from a linen-cotton mix found at Truro Fabrics.
I am a size 12 and made a 'large' from the pattern, cutting the pocket linings from some batik cotton that was in my stash.
 The pattern said to get 3 yards and I bought 2.5m but there was plenty to spare.
 
All in all I think it is a great pattern
 (no surprises there as there is a huge flickr pool of dresses made from the pattern to see for yourself)
and certainly one that I will be using again....soon.
 
Washi Dress
 
Good with tights too as the weather here is starting to get autumnal.

Sunday 29 September 2013

Lots of sewing and no time to blog!

Sorry for the lack of news this week but I have been busy sewing.
Two pencil rolls..
 
Two pencil rolls for a charity sale
 
..more pictures when the sun comes out.
These are for a charity sale that my Mum's sewing group is putting on.

And some dressmaking that I will share soon.
 A little black dress for child number one and a Washi Dress for me.
 
I bought the pattern online and it was emailed to me the same day!
Printed out and put together, and after a trip to Truro last weekend I have some fabric, a linen-cotton mix, to try it out.
I have been doing my first ever bit of shirring today..
 
Shirring - Washi Dress to follow..
 
Must go, sleeves and hem to do!
 

Monday 16 September 2013

Rosy Red Apples

 
14.9.13 011b
 
The apples are good this year and I particularly like this tree because of the rosy red apples.
I have taken one load already to be pressed by someone in a nearby village
and can't wait to taste the juice.
 
14.9.13 014b

I have also made a phone case this time for me.
 
14.9.13 017b

The fabric came from my Mum and was in a sale in Plymouth (thanks Mum)
so I am not sure of the name,
 but having just looked it up I think it is
 Acorn Chain in Berry by Joel Dewberry for the binding.
And the other one is Amy Butler's deco dots in citrine from the Gypsy Caravan Collection by Rowan.

Long and complicated names for what I thought looked like green and red apples!
 

14.9.13 018b


Monday 9 September 2013

Lavender Heart Tutorial

Lavender hearts
 
I thought I would do a little tutorial as I haven't done one for a bit.
 
It's a good one for using up scraps especially the ends of strips if, like me,
you have just made a peg bag.
 
Anyway start by drawing up a template heart.
 Mine is about 16cm in height and 15cm across but you can make it however big you like.
I made mine from cardboard.

Place the template on a piece of plain fabric.
This piece will be covered in a minute so any old scrap will do. I used an old pillow case.
Draw round the heart template using a fabric marker (or biro!).


Lavender heart tutorial picture 1


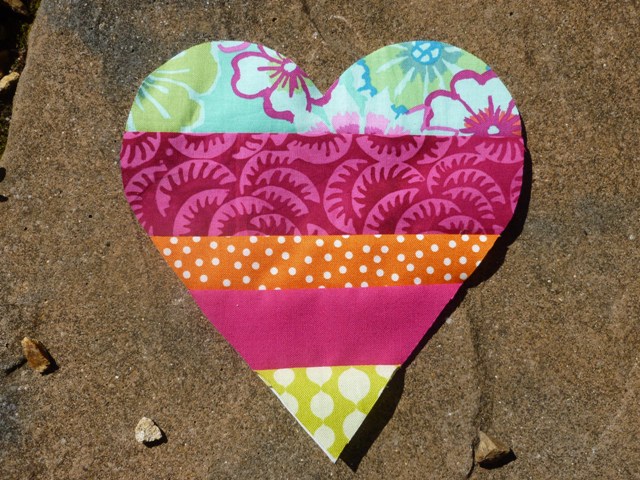
Next lay some small strips of fabric over the heart until you get a colour and pattern combination
 you like and the heart is completely covered.


Lavender Heart tutorial picture


Then take the strips off, placing them on one side and keeping them in order.

Place the plain fabric with the heart drawn on it, right side down on the mat in front of you.

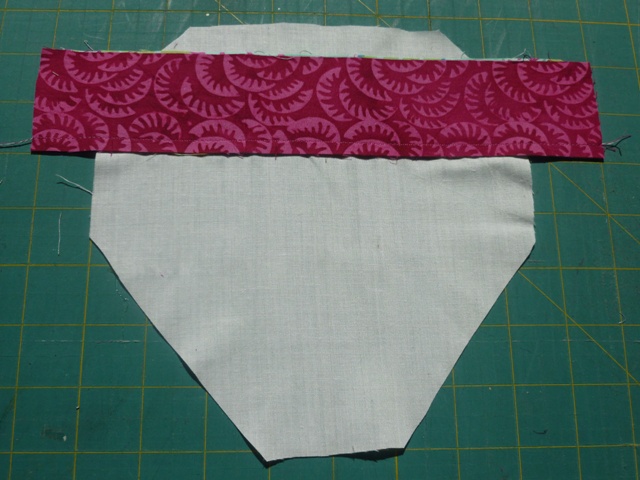
Take the first strip and place it right side up on the top of the backing fabric (mine is a bit further down to show you the placing but it's ok as long as the heart is covered.
Then take the second strip and place it right side down on top of the first strip, matching the bottom edges, and sew a straight 1/4" seam through all three layers as shown below.
Then open out the second strip so they are both right sides up and press.


Lavender heart tutorial picture 2


Add the next strip in the same way, right side down onto edge of second strip and continue until the background is covered.
I think this method is called 'stitch and flip'.
 

Lavender heart tutorial picture4
 

If you turn this over you should now have the heart shape drawn on the back..


Lavender heart tutorial picture 5


which can be used to cut the heart out.
 
 
Lavender heart tutorial picture 6
 

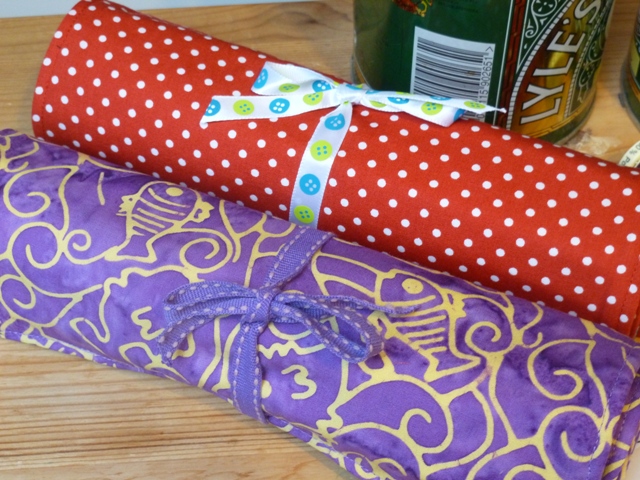
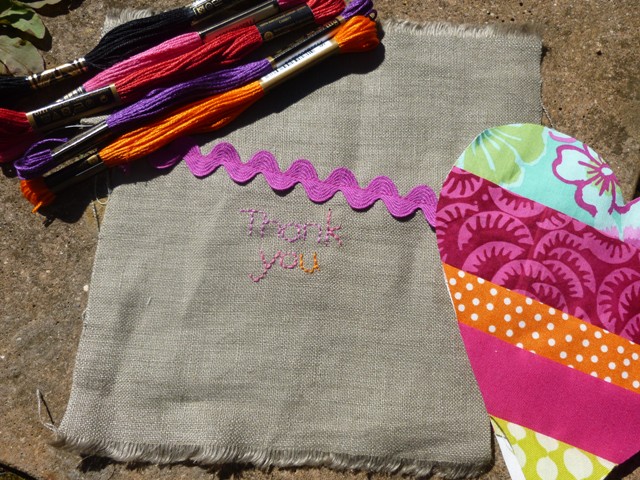
Next, it's time to make the back of lavender bag.
 
This can be made of any fabric really but I like to use linen.
If, like me, you haven't got a big enough piece,
 just join two bits together and add a bit of ric rac or ribbon to cover the join.
 
You can also add a bit of embroidery if you want to.
 Here I used two strands of Anchor embroidery thread and backstitched the letters free hand.
 
 
Lavender heart tutorial picture 7
 

Place the linen on the table right side up, and place the fabric heart on top of it right side down.
Pin in place, keeping any embroidery roughly in the middle of the heart.
Sew around the edge about 1/4" in, through all layers, leaving a 2" gap for stuffing.
 
(You can also add a loop of string at the top of the heart, in between the two layers before sewing this bit if you want it to hang up. Remember to put the loop in the middle and the ends sticking out so that when you turn it inside out the loop will be on the right side.)
 
 
Lavender heart tutorial<a href=
 

Trim away the excess linen, and clip the curves before turning right sides out.
Press with an iron before filling, as this helps the finished heart to look neater.
 
I filled mine with half lavender and half toy stuffing as I think this keeps it's shape longer but it's up to you.
Sew up the opening by hand (I use ladder stitch for this bit).
 
 
Lavender hearts


Saturday 7 September 2013

Pretty Pegs and a Pot

A new peg bag
 
I made a new peg bag yesterday as last year's one broke and I have been using one from a couple of years ago that looks very sad...
 
The old peg bag!
 
If you want to make one too, I made a tutorial for this a while ago that you can find here.
The flower was made using this tutorial over at Cluck Cluck Sew.
 
 
A basket cover

I also managed to get a picture of a basket cover I made for someone while we were away this summer.
It is completely made up and not quite the same at both ends, but it did the trick of keeping the flies off the veg while we were camping!

And finally, I wanted to show you this lovely Orla Kiely pot that I was given a while ago for my birthday and which I am ashamed to say was looking a little unloved when the person who gave it to me called round.

My birthday pot by Orla Kiely
 
I have now bought some basil,
as my efforts to grow some failed,
 and the pot is looking rather gorgeous on the kitchen table.
Thank you K
x


Tuesday 3 September 2013

A Scrapadelic Scarf

My version of the Scrapedelic Scarf from tutorial by Crochet in Colour
 
I have been working on this one for a while now but had the deadline of my younger brother's birthday to spur me on to getting it finished for him.
 
It is a scarf based on the tutorial by Liz at Crochet in Color and has the great name of a
Scrapadelic Scarf!
 
My version of the Scrapedelic Scarf from tutorial by Crochet in Colour
I made mine a bit wider and only used three colours but my favourite bit is the plats on the ends which she explains really well.
I like the look of the chevron one she is working on now too.
 
My version of the Scrapedelic Scarf from tutorial by Crochet in Colour
 
Last week of the summer holiday here and we have been out picking these..

A great crop of blackberries this year

which with a bit of this ..

Blackberry Jelly in the making

turned into this.

Blackberry Jelly

Yum. 

Tomatoes doing well

The tomatoes and courgettes are doing really well this year which is a bit of a bonus after last year's washout.
I bought my Dad some seeds for Christmas including different varieties of tomatoes and courgettes so I have him to thank for the variety of this year's produce.
The courgettes are particularly wacky..
 
Courgettes
 
And finally my second Sprocket Pillow (she said one would never be enough!)
which is destined to be a present for a friend.
 
Mr second sprocket pillow from tutorial by Cluck Cluck Sew.
 
More about these in my last post here.