Tuesday 30 April 2013

Skirts for work.

 
New Look pattern 6053

I have made this pattern before here, so it was nice and easy to cut out two more skirts and they came together in no time.
 
The pattern is New Look 6053 and I made view E.
 The only alteration is that I lined them with some lining material because I tend to wear them with tights and otherwise they stick!
 
New Look pattern 6053 made from needlecord

This first one is made from a patterned needlecord that I bought in Truro Fabrics a few weeks ago.
It was lovely to sew with and there is a strip left that I was wondering if it would make one of these.

New Look pattern 6053 made from a cotton batik fabric.

The second skirt is made from a cotton batik fabric and I will try and get the details of the online shop although I picked it up at a local quilt exhibition. 
 
New Look pattern 6053

Monday 29 April 2013

Spring has sprung

Busy around here at the moment with one thing and another, I love this time of year.
 
The woods and the garden are taking off now that Spring has finally sprung..

Primroses are anazing

The primroses are amazing this year.

Ferns are unfurling

The ferns are unfurling.

Tulips

The tulips mentioned here are now out..

Tulips

And this beauty too.

Artichoke
 
The artichoke is growing like mad.

Rosemary in flower

The rosemary is covered in flowers.

Four new members of the family

These four chicks have joined the family..

I think we have a visitor in the veg patch!

and this new visitor is less welcome in the middle of my newly planted potatoes!!

The fields are being ploughed

Why can't the rabbit go and live in the field where they are planting thousands of potatoes rather than in our little plot.
 
Must go and do some sewing.
Skirts to make.

Thursday 25 April 2013

Jolly Molly Tutorial

Jolly Molly
 
Here goes..

You will need..
17 x 82 cm piece of old curtain lining or other fabric
17 x 82 cm piece of blanket (or wadding)
17 x 82 cm piece of cotton fabric or recycled shirt

2 x (17 x 20)cm pieces of blanket
2 x (17 x 20)cm pieces of medium weight fabric for pockets
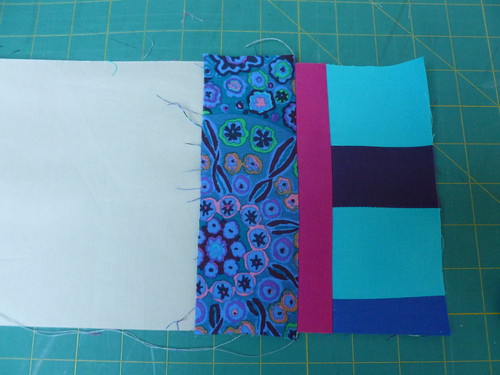
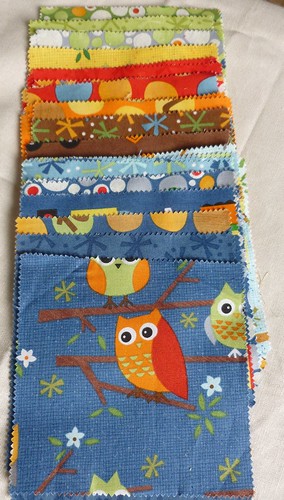
Scraps of cotton fabric for stitch and flip

Bias binding to coordinate
Small loop of ribbon or fabric loop

Method:
Take a piece of medium weight cotton fabric (I used an old curtain lining), and cut to 17 by 82cm.

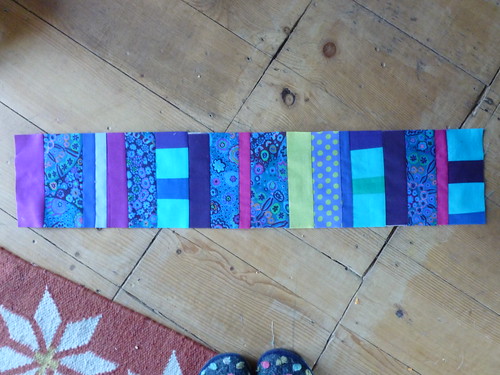
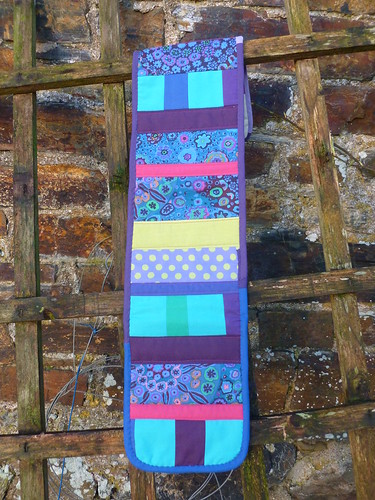
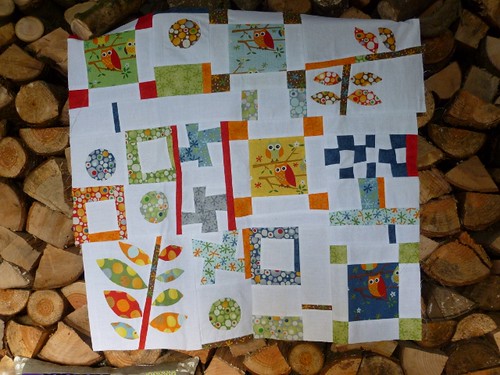
Use this as your base and cover the entire surface using stitch and flip.
This is a well used method and there are some pretty good tutorials around if you need one.


                             Jolly Molly Tutorial Jolly Molly Tutorial
 
 
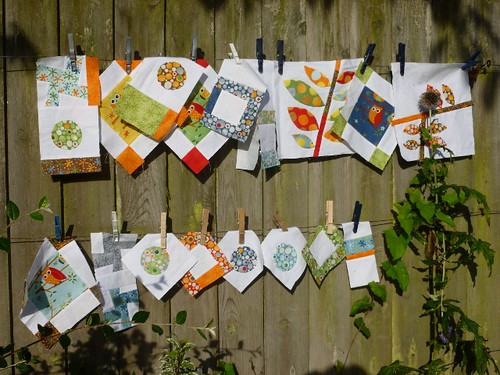
Basically it involves stitching strips to a backing fabric and each time you add another strip, you sew it to the last piece right sides together, and then flip it over to show the right side and iron it down before adding the next strip. I think this is the fun bit, picking out scraps of fabric and matching them up together to suit the person you are going to give to. Are they bright and bold, calm and quiet, pretty in pink, or keen on purple!!

Jolly Molly Tutorial

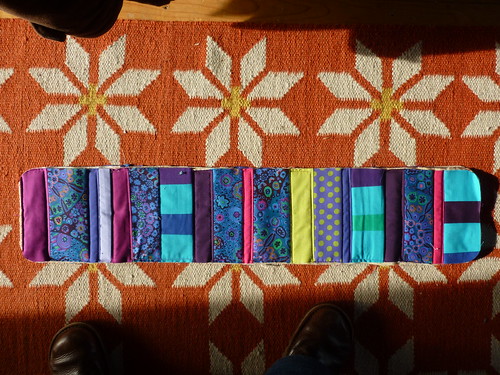
Once you have covered the fabric, trim any uneven edges.

Then cut a further two pieces 17 by 82 cm, one from old blanket (or you could use wadding), and one from cotton (I use an old shirt here although you may need to join two pieces of shirt to make it big enough unless you know a very big person!).

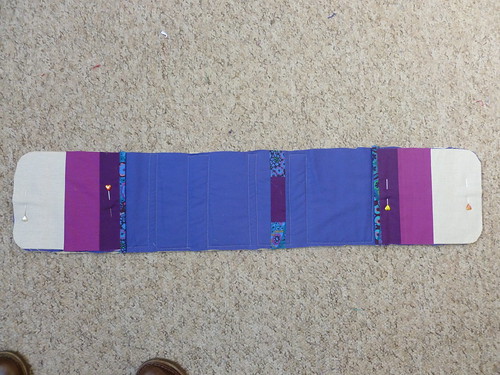
Now it's time to put it all together.

Place the main piece of stitch and flip on a flat surface right side down.
On top, place the large piece of blanket.
Then place the smaller blanket rectangles one on each end (these are for extra padding to stop you burning your hands).
Then lay the piece of shirt fabric (or whatever you are using) right side up on the top.
Then you should have what looks like a long fabric sandwich.

It is at this point that I have to admit how lazy I am when sewing. I would like to say that it is because I am pushed for time, but actually I am just keen to get it all finished.
You could pin (with big quilting pins or safety pins) the sandwich together and then tack it all. Sometimes if it's going to someone as a present I 'glue' the layers together using temporary fabric adhesive spray.
 
But if it's just for me I shove in a couple of pins and wing it!!
 
So then you need to quilt together the layers. It doesn't really matter how and 5 or 6 short stripes will hold it fine, but you could also do wiggly lines, circles, or any old pattern of quilting that you fancy.


Jolly Molly Tutorial
 
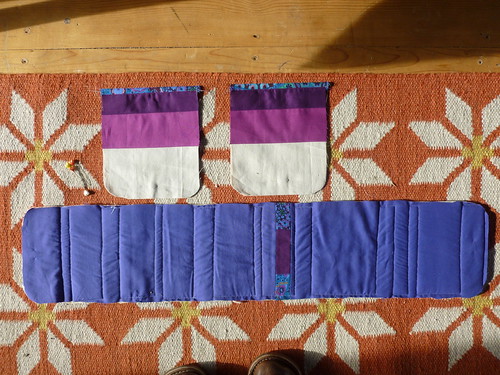
Then cut two rectangles 17 by 20 cm. These will form the pockets on either end. They can be made from any fabric but need to hold their own, so if you use a thinish cotton I would line it ie make it double. Bind the top edge of the pockets either with bias binding or a strip of fabric.

Jolly Molly tutorial


It is at this point that I usually slightly round the corners of the main piece and the pockets as shown above.

Next place the pockets on either end (wrong side of the pocket to the right side of the shirt material) and pin and/or tack in place.

Jolly Molly Tutorial

The aim is to sew all the way round the edge, about 1cm in, attaching all the layers together. 
Go for it.

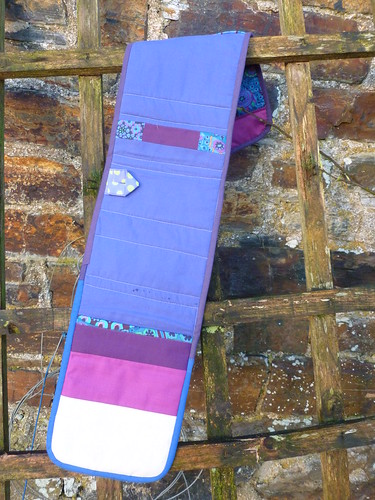
Finally use the bias binding to bind round the edge. Tuck in a little loop of ribbon or fabric to hang it up with as you sew on the bias binding.

Jolly Molly Tutorial

I sewed the bias binding on to the shirt side first, following the stitching line from previously sewing the sandwich all together, and then hand sewed it down to the front, but you can do it either side first really.


Jolly Molly

Ta da.
 
Please let me know if you make one and if there are any bits of the tutorial that don't make sense and I will try and clarify.

Happy sewing.

Monday 22 April 2013

Gloves and gardening

I had some leftover bits of yarn from the ripple blanket and wanted to make some fingerless gloves.
I tried a pattern where they were crocheted in the round but I couldn't get them to fit very well.
 Then I went back to the lovely Attic24 and looked at Lucy's idea of two simple rectangles and decided that was more my style.
And here they are..
 
New gloves based on idea by Lucy at Attic 24.

Photos courtesy of the boy as I couldn't work out how else to do it!

New gloves based on idea by Lucy at Attic 24
 
We had a busy gardening weekend here..
 
Broad beans are planted out
 
Broad beans are in.
 
Potatoes are in, better late than never
 
As are the potatoes.
 
Tomatoes and antirrhinum
 
Tomatoes and antirrhinum coming along.
 
Sweet peas are doing ok
 
Sweet peas nearly ready for outside.
 
Magnolia Stellata is a bit weather beaten but still beautiful
 
Magnolia a bit weather beaten but still beautiful.
 
A tub of tulips ready to flower
 
And a pot full of promise!

Tuesday 16 April 2013

A finished Ripple Blanket

Finished ripple blanket
 
I started this back in february and blogged about it here, here and here.
 
I have done a couple of ripple blankets before but needed a refresher and found a brilliant tutorial by Lucy at Attic24 here.
 
So armed with a stack of bright and cheerful acrylic yarn, I have been rippling along now and again since then. I paticularly liked the way that Lucy managed to crochet a border around her blanket and although she hasn't got a tutorial for this, she does explain how she did it. I think it really finishes the blanket and seems to hold it's shape alot better than the unedged ones.
 
Finished ripple blanket
 
The magnolia stellata is just about starting to flower now.
 
Finished ripple blanket

Monday 15 April 2013

Two cards and a commission!

I don't make things to sell generally.
I have tried in the past doing a couple of craft markets and making for a gallery but somehow it takes the joy out of my making.
I am lucky enough to have a job that I enjoy and that earns me a wage, and my sewing and making is done purely for relaxation and pleasure.
 I like sharing and helping others to find pleasure in sewing for themsleves.
I like to make things for people I know, often pondering about them as I make.

Anyway, I was recently asked by someone if I would make a birthday card on commission.
 As I know the person for whom it was intended, I readily agreed.
I did lots of looking around for ideas but couldn't really find what I was after.
Then I called in at Mum's and she had a lovely snowdrop card, handmade by a friend, using a sort of quilting type of idea.
 
So having sketched out my idea for a picture, found an old white linen shirt, a piece of wadding and some scraps I set to work.
The result was this..

Handmade birthday card
 
It was really fun to do.
 
So I did another one..

Handmade birthday card
 
for my Dad!

Friday 5 April 2013

Sampler quilt finally finished

Despite the windy day, I managed to get some photos of my finished sampler quilt.
 
I started it back in August 2012 when I bought a charm pack (I think that's what you call it, squares to you and me) of fabric by Moda called 'Ten Little Things'.

A pack of 'Ten Little Things' by moda

I wanted to use just the one pack and an old white sheet and see what I could come up with.
I turned to Gwen Marton's Liberated Quiltmaking II for inspiration, and off I went. 
 
Just starting to play with the new pack of squares ('Ten Little Things' by Moda) and looking to my favourite Liberated Quiltmaking II by Gwen Marston for inspiration.
 
The blocks grew slowly one here and one there..
 
Quilt is growing too
 
Trying out new ideas and techniques as I went..
 
A make shift design wall
 
When I had used all the bits I could, I pieced them together using various strips as fillers..
 
 
Liberated sampler-WIP
 
Then as usual it took me a while to get quilting.
 
 I decided all the white needed a bit of colour and texture, and I had seen some lovely Kantha Quilts which I liked. So that was the inspiration for the colurful quilting..
 
Sampler quilt. Starting to quilt 'kantha' style.
 
It was a good project that I could sit and do by hand but it did take a while to finish.
 
So 8 months after it began, here is the finished quilt.
 
Finished sampler quilt
 
Bound with a red and white spotted fabric (not sure of the make sorry) and then washed and dried in the sunshine. 
 
Finished sampler quilt
 
Quilt
 
Now I need to try and get on with the cartwheels but it may take a while so don't hold your breath!!
 

Thursday 4 April 2013

A little skirt for a little person

I saw this tutorial over at Sew Mama Sew here, and couldn't resist having a go.
 
So while I was at Cowslip seeing the wonderful exhibition of quilts by Sue Spooner and Helen Keenan, and the reclaimed people by Edwina Bridgeman (exhibition ends tomorrow and well worth a visit if you are near), I just had to pop into the shop and get some fabric.
 
Skirt made from tutorial over at Sew Mama Sew.
Anyway, the skirt.
 The fabric is mainly Rowan with a plain cotton added from my stash. The tutorial was easy to follow and quick, which is always a bonus in my book.
I added a lining and some ric rac. The only other difference from the pattern was that I made a false bow, as I couldn't see the point of threading it all the way round the waist as well as the elastic.
 
Just have to wait for the small person's birthday now.