Showing posts with label tutorial. Show all posts

Sunday, 1 March 2015

Flower Brooch Tutorial

Ok, so here goes on the flower brooch tutorial
but you will have to let me know if this makes sense because tutorial writing isn't my strong point.
 
Flower brooch tutorial

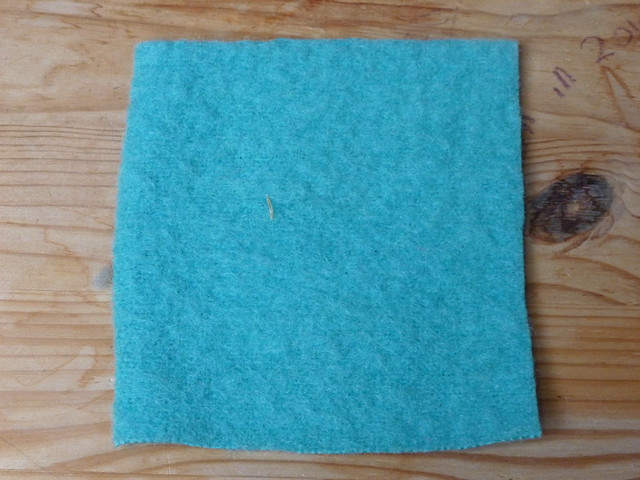
Start by cutting a square of blanket or thick felt (felted jumper would also work for this).
It needs to be big enough to allow a 1-2cm border around the flower.
If you sketch the finished flower size and shape that you want on a piece of paper first this will give you rough dimensions to aim for.
Flower brooch tutorial

Next, go to your scrap pile/box/heap and root through for the petals.
 This is where you can use up some of those weeny bits of your favourite fabrics that you just couldn't bare to part with.
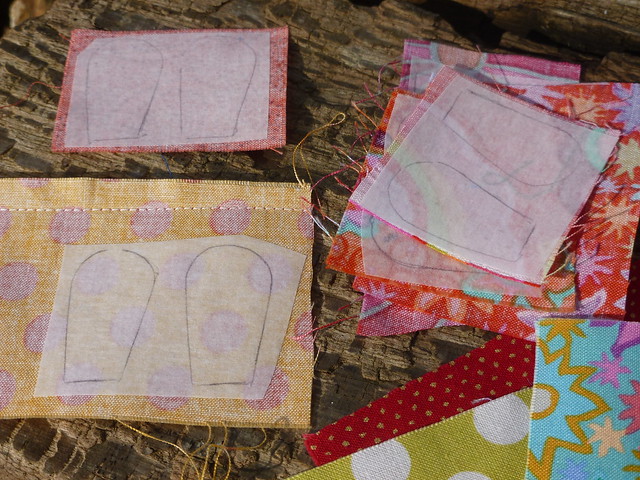
Iron them flat and then draw the petals you want on some Bondaweb (or other double sided bonding type stuff!) and cut out leaving a small border, before peeling off one side of the paper and ironing onto the scraps of fabric (see above). 
Flower brooch tutorial

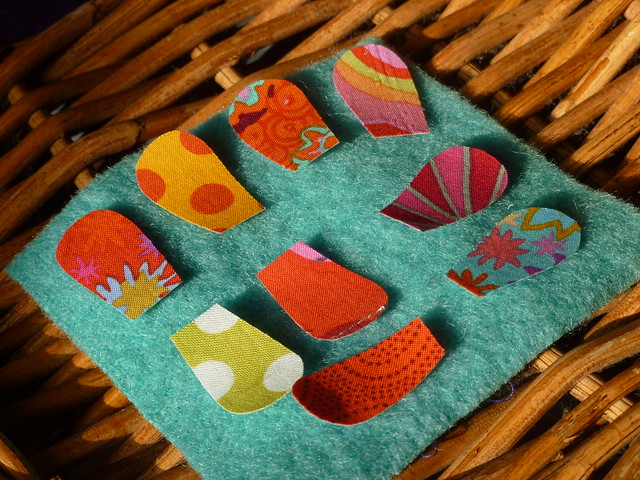
Cut out the petals.
You should have ended up with a bunch of petals like this and the next step is to play around with them until finding a layout you like.
There is a lot of playing around with colourful scraps in this project
 which I guess is why I enjoy it so much!
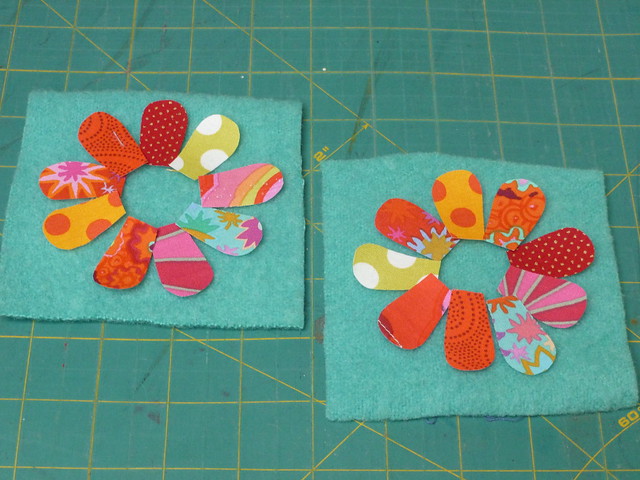
Flower brooch tutorial

When you have the petals as you want them, peel off the other paper on the bondaweb (this is a bit tricky as the petals may be small but I found that making a very small sort of tear just started it off).
Place the petals back in the position you planned and iron in place...
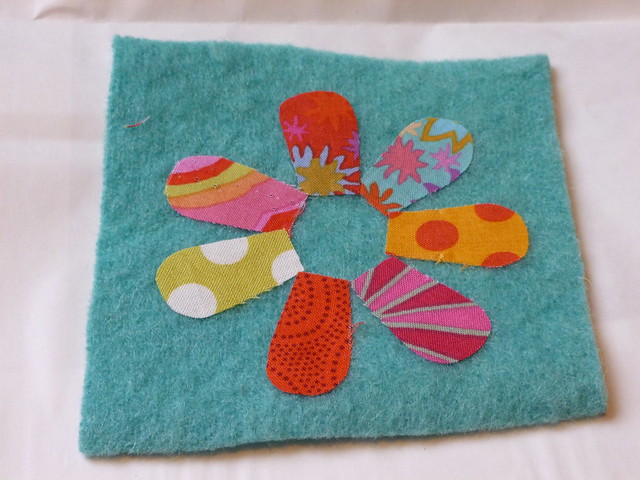
Flower brooch tutorial
You should now hopefully have a square of blanket with the petals stuck to it as above.
Now for some fun with free machining..
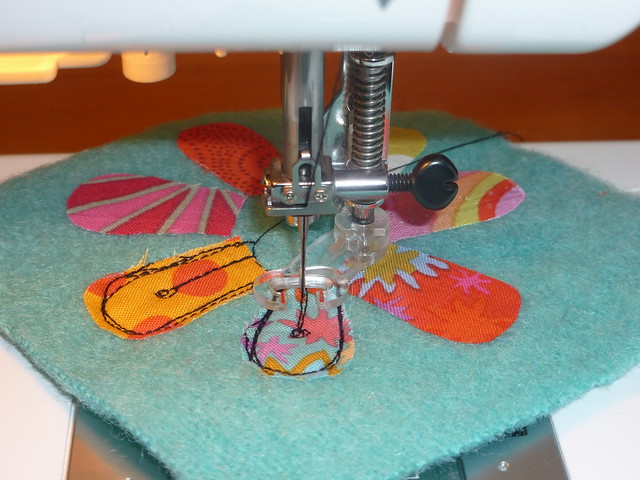
 
Flower brooch tutorial
 
I used black thread (top and bobbin) but you could use any colour you like.
Drop the feed dogs and put on a free motion/darning foot and go ahead and do some "drawing" on the petals any way you like. I used a couple of loops of stitching to roughly outline the petals and added a stamen on each one on this flower. Remember that the central part will be covered by felt in a minute so wobbles there don't matter.
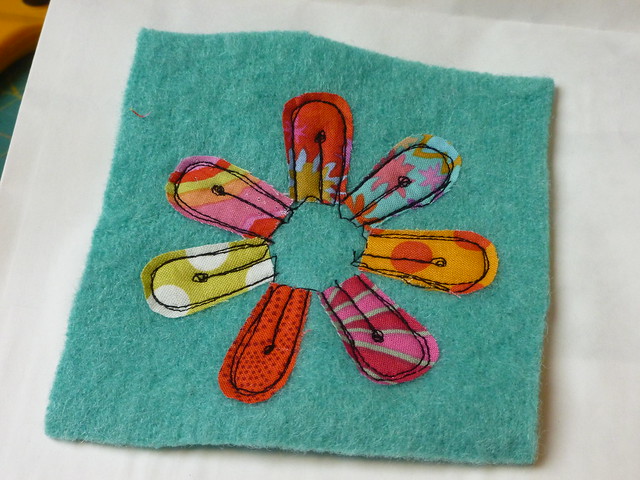
Flower brooch tutorial
 
Next cut some circles of coordinating felt (or other fabric if you like).
These can be held in place by some more free machining (as below in a spiral) but equally you could hand stitch this bit or add a button if you wanted.
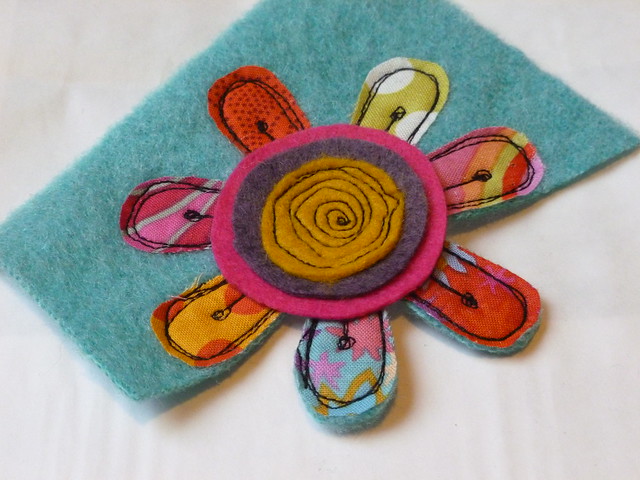
Flower brooch tutorial
Now cut away the blanket around the petals and you are nearly there.
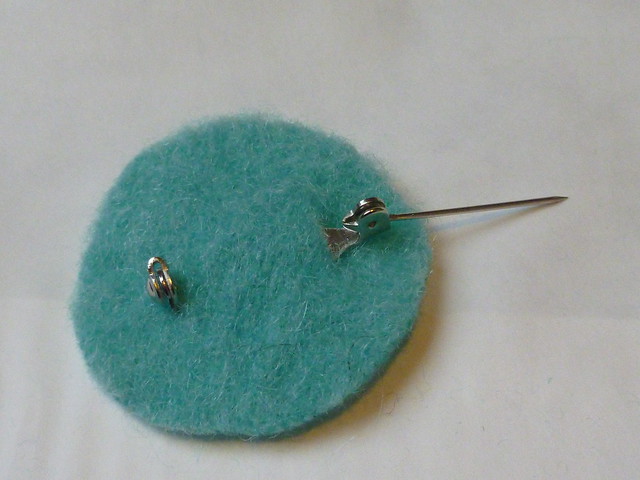
 
Flower brooch tutorial
For the pin, I used a brooch clip pushed through two small slits in another circle of blanket.
(If you don't have a brooch pin, a small safety pin will also do the trick and can be sewn on).  
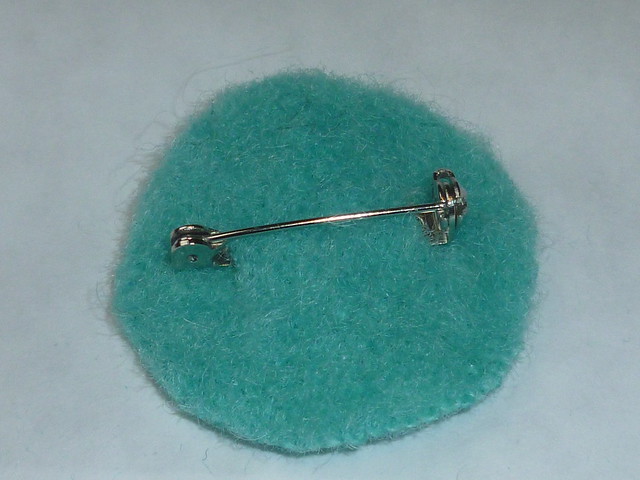
 
Flower brooch tutorial
This can then be glued to the reverse of the flower.
(Hot glue works well but any craft glue would do).
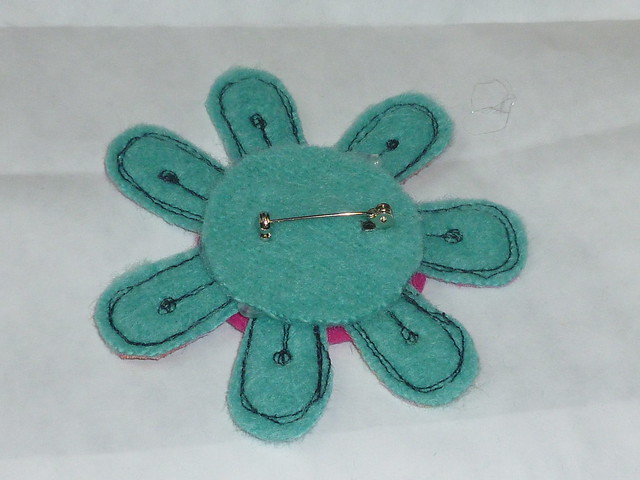
Flower brooch tutorial
And that's it!
You will hopefully have ended up with something like this.
They can be pinned to a present, bag, coat or anything you like really.
 
For children I would attach the flower to a hairclip,
band or bobble as an alternative to the pin.
 
I would love to see if you make some and if any parts of the tutorial don't make sense please let me know and I will do my best to try and explain!


Happy sewing.
Vicky x

Monday, 9 September 2013

Lavender Heart Tutorial

Lavender hearts
 
I thought I would do a little tutorial as I haven't done one for a bit.
 
It's a good one for using up scraps especially the ends of strips if, like me,
you have just made a peg bag.
 
Anyway start by drawing up a template heart.
 Mine is about 16cm in height and 15cm across but you can make it however big you like.
I made mine from cardboard.

Place the template on a piece of plain fabric.
This piece will be covered in a minute so any old scrap will do. I used an old pillow case.
Draw round the heart template using a fabric marker (or biro!).


Lavender heart tutorial picture 1


Next lay some small strips of fabric over the heart until you get a colour and pattern combination
 you like and the heart is completely covered.


Lavender Heart tutorial picture


Then take the strips off, placing them on one side and keeping them in order.

Place the plain fabric with the heart drawn on it, right side down on the mat in front of you.

Take the first strip and place it right side up on the top of the backing fabric (mine is a bit further down to show you the placing but it's ok as long as the heart is covered.
Then take the second strip and place it right side down on top of the first strip, matching the bottom edges, and sew a straight 1/4" seam through all three layers as shown below.
Then open out the second strip so they are both right sides up and press.


Lavender heart tutorial picture 2


Add the next strip in the same way, right side down onto edge of second strip and continue until the background is covered.
I think this method is called 'stitch and flip'.
 

Lavender heart tutorial picture4
 

If you turn this over you should now have the heart shape drawn on the back..


Lavender heart tutorial picture 5


which can be used to cut the heart out.
 
 
Lavender heart tutorial picture 6
 

Next, it's time to make the back of lavender bag.
 
This can be made of any fabric really but I like to use linen.
If, like me, you haven't got a big enough piece,
 just join two bits together and add a bit of ric rac or ribbon to cover the join.
 
You can also add a bit of embroidery if you want to.
 Here I used two strands of Anchor embroidery thread and backstitched the letters free hand.
 
 
Lavender heart tutorial picture 7
 

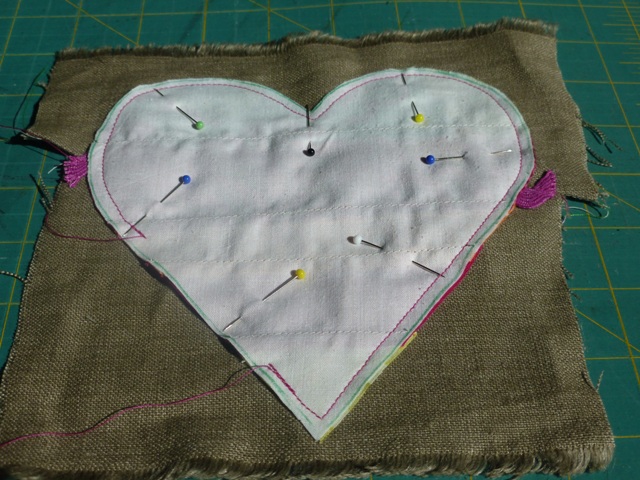
Place the linen on the table right side up, and place the fabric heart on top of it right side down.
Pin in place, keeping any embroidery roughly in the middle of the heart.
Sew around the edge about 1/4" in, through all layers, leaving a 2" gap for stuffing.
 
(You can also add a loop of string at the top of the heart, in between the two layers before sewing this bit if you want it to hang up. Remember to put the loop in the middle and the ends sticking out so that when you turn it inside out the loop will be on the right side.)
 
 
Lavender heart tutorial<a href=
 

Trim away the excess linen, and clip the curves before turning right sides out.
Press with an iron before filling, as this helps the finished heart to look neater.
 
I filled mine with half lavender and half toy stuffing as I think this keeps it's shape longer but it's up to you.
Sew up the opening by hand (I use ladder stitch for this bit).
 
 
Lavender hearts


Thursday, 25 April 2013

Jolly Molly Tutorial

Jolly Molly
 
Here goes..

You will need..
17 x 82 cm piece of old curtain lining or other fabric
17 x 82 cm piece of blanket (or wadding)
17 x 82 cm piece of cotton fabric or recycled shirt

2 x (17 x 20)cm pieces of blanket
2 x (17 x 20)cm pieces of medium weight fabric for pockets
Scraps of cotton fabric for stitch and flip

Bias binding to coordinate
Small loop of ribbon or fabric loop

Method:
Take a piece of medium weight cotton fabric (I used an old curtain lining), and cut to 17 by 82cm.

Use this as your base and cover the entire surface using stitch and flip.
This is a well used method and there are some pretty good tutorials around if you need one.


                             Jolly Molly Tutorial Jolly Molly Tutorial
 
 
Basically it involves stitching strips to a backing fabric and each time you add another strip, you sew it to the last piece right sides together, and then flip it over to show the right side and iron it down before adding the next strip. I think this is the fun bit, picking out scraps of fabric and matching them up together to suit the person you are going to give to. Are they bright and bold, calm and quiet, pretty in pink, or keen on purple!!

Jolly Molly Tutorial

Once you have covered the fabric, trim any uneven edges.

Then cut a further two pieces 17 by 82 cm, one from old blanket (or you could use wadding), and one from cotton (I use an old shirt here although you may need to join two pieces of shirt to make it big enough unless you know a very big person!).

Now it's time to put it all together.

Place the main piece of stitch and flip on a flat surface right side down.
On top, place the large piece of blanket.
Then place the smaller blanket rectangles one on each end (these are for extra padding to stop you burning your hands).
Then lay the piece of shirt fabric (or whatever you are using) right side up on the top.
Then you should have what looks like a long fabric sandwich.

It is at this point that I have to admit how lazy I am when sewing. I would like to say that it is because I am pushed for time, but actually I am just keen to get it all finished.
You could pin (with big quilting pins or safety pins) the sandwich together and then tack it all. Sometimes if it's going to someone as a present I 'glue' the layers together using temporary fabric adhesive spray.
 
But if it's just for me I shove in a couple of pins and wing it!!
 
So then you need to quilt together the layers. It doesn't really matter how and 5 or 6 short stripes will hold it fine, but you could also do wiggly lines, circles, or any old pattern of quilting that you fancy.


Jolly Molly Tutorial
 
Then cut two rectangles 17 by 20 cm. These will form the pockets on either end. They can be made from any fabric but need to hold their own, so if you use a thinish cotton I would line it ie make it double. Bind the top edge of the pockets either with bias binding or a strip of fabric.

Jolly Molly tutorial


It is at this point that I usually slightly round the corners of the main piece and the pockets as shown above.

Next place the pockets on either end (wrong side of the pocket to the right side of the shirt material) and pin and/or tack in place.

Jolly Molly Tutorial

The aim is to sew all the way round the edge, about 1cm in, attaching all the layers together. 
Go for it.

Finally use the bias binding to bind round the edge. Tuck in a little loop of ribbon or fabric to hang it up with as you sew on the bias binding.

Jolly Molly Tutorial

I sewed the bias binding on to the shirt side first, following the stitching line from previously sewing the sandwich all together, and then hand sewed it down to the front, but you can do it either side first really.


Jolly Molly

Ta da.
 
Please let me know if you make one and if there are any bits of the tutorial that don't make sense and I will try and clarify.

Happy sewing.